Tour the BoardCraft Editor: Know Your Workspace
The editor becomes much easier once you know where each type of control lives. This visual tour explains the toolbar, design tools, canvas, inspector, saving controls, and export options.
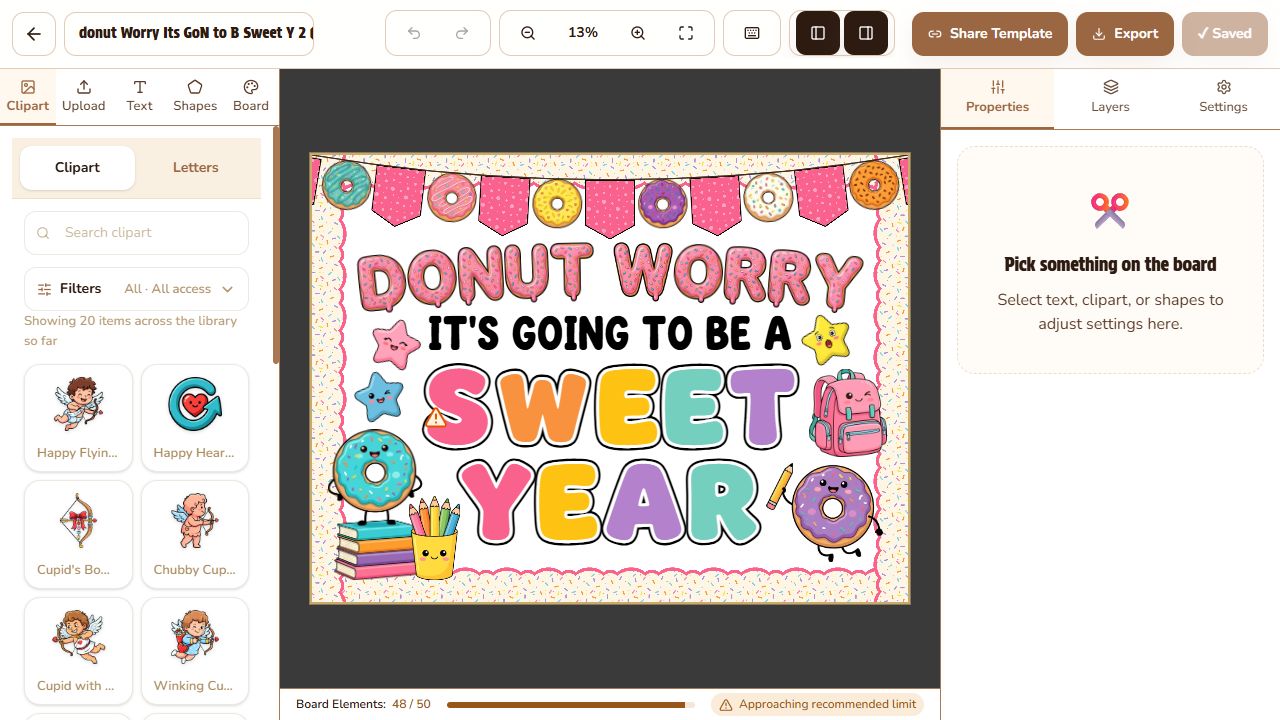
Left: Add Choose clipart, letters, uploads, text, shapes, and the board background.
Center: Arrange Select, move, resize, rotate, and review the complete classroom display.
Right: Refine Edit Properties, manage Layers, and adjust board or editor Settings.
In this tour
Area 1
The top toolbar
The toolbar keeps project-wide actions available while you design. From left to right, you can:
Return to your boards.
Click the board title to rename it.
Undo or redo recent changes.
Zoom out, zoom in, or use Fit to screen.
Open the keyboard-shortcut guide.
Hide or show the tools and inspector panels.
Manage template sharing when your plan supports it.
Open Export or manually Save the board.
Area 2
The left tools panel
The left panel is where new content enters the board. Selecting a tab changes the library or controls shown underneath it.
Clipart
Search and filter printable illustrations. Inside this tool, switch to Letters to browse letter sets and open the Word Builder.
Upload
Add and manage your own images when personal uploads are available on your plan.
Text
Choose a font to add a text element, then edit its wording and appearance from Properties.
Shapes
Add simple or decorative shapes for labels, panels, accents, and visual structure.
Board
Change the actual board background using a solid color or pattern.
Library filters
Narrow results by category and access level. Premium badges identify items that need a paid plan.
Selecting a library item usually adds it near the center of the board. From there, move and resize it on the canvas.
Area 3
The canvas and selection controls
The center workspace shows the full board against the editor canvas background. The board is what exports; the darker area around it is only your workspace.
Click an element to select it. Selection handles appear around the item, and a context toolbar appears above the board. Depending on the element type, that toolbar can offer:
Solid, gradient, or pattern fill modes.
Edit Text or another element-specific edit action.
Duplicate, lock, hide, and delete.
Drag the selected element to move it. Drag its handles to resize it, and use the rotation handle when available. Clicking an empty area clears the selection.
Area 4
Properties: precise element editing
Select an element and open Properties on the right. The available controls change to match the selected item.
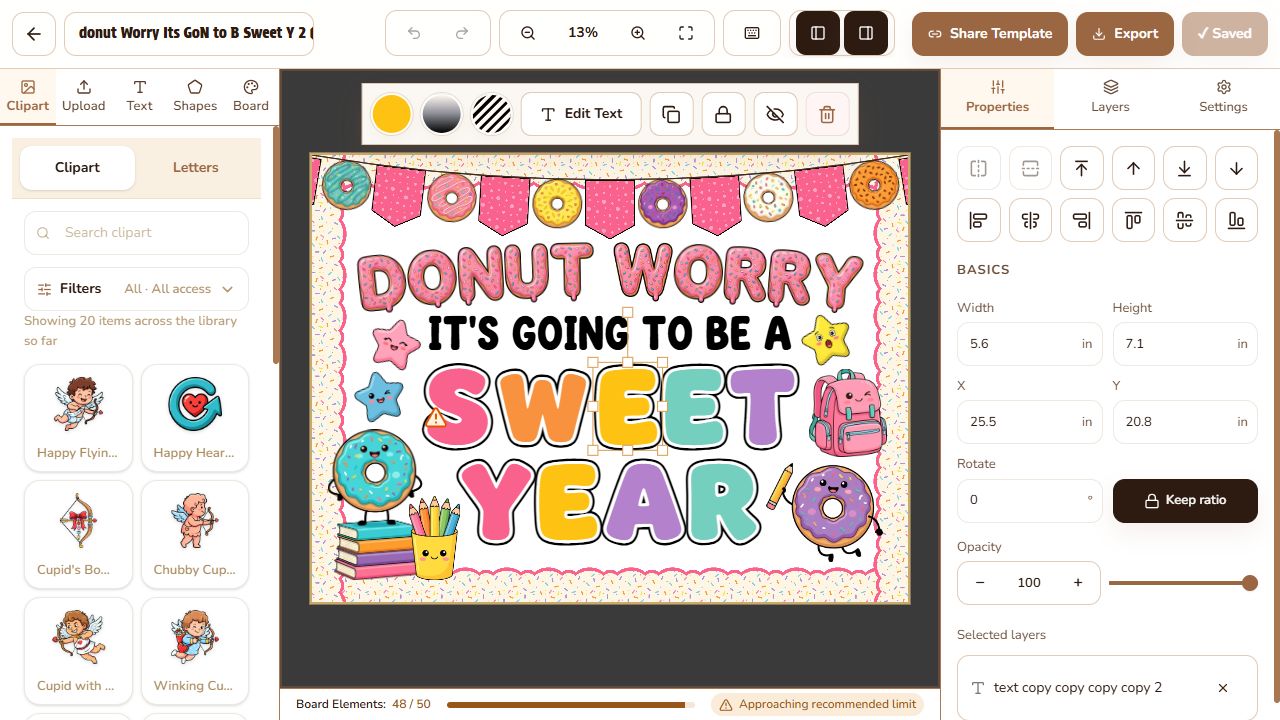
Common controls include:
Layer order: bring an item forward, send it backward, or move it directly to the front or back.
Board alignment: snap an item to the left, center, right, top, middle, or bottom of the board.
Size and position: enter exact width, height, X, and Y values in inches.
Rotation and opacity: enter exact values or use the provided controls.
Keep ratio: preserve an item’s proportions while resizing.
Text, shapes, clipart, banners, borders, and name tags expose additional controls below these basics. Scroll within the inspector to see the complete set.
Area 5
Layers: manage overlapping items
The Layers tab lists the design’s elements even when they are difficult to click on the board. It is especially useful for borders, backgrounds, grouped items, and decorations that overlap.
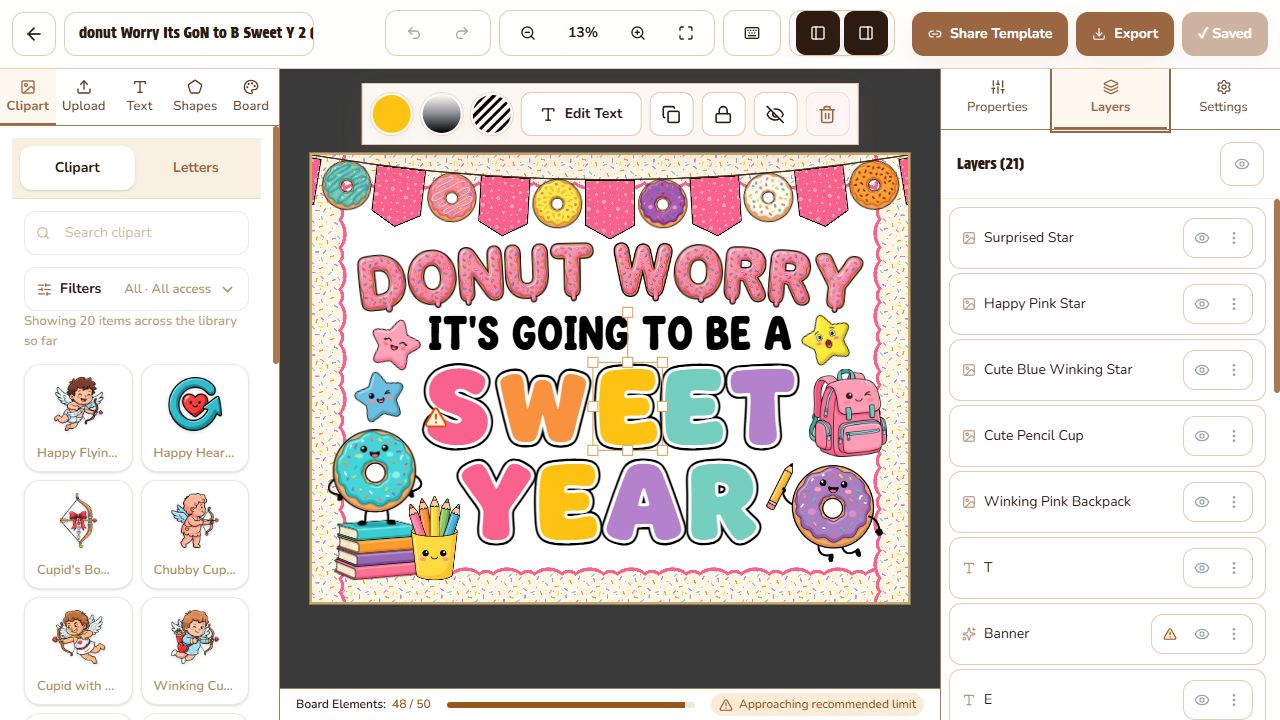
From Layers you can select an item, show or hide it, and open its action menu. The eye control at the top changes visibility for all listed layers. Warning icons identify items that may need tiled printing because of their physical size.
Area 6
Settings: board and editor preferences
The Settings tab controls the project size and several workspace preferences.
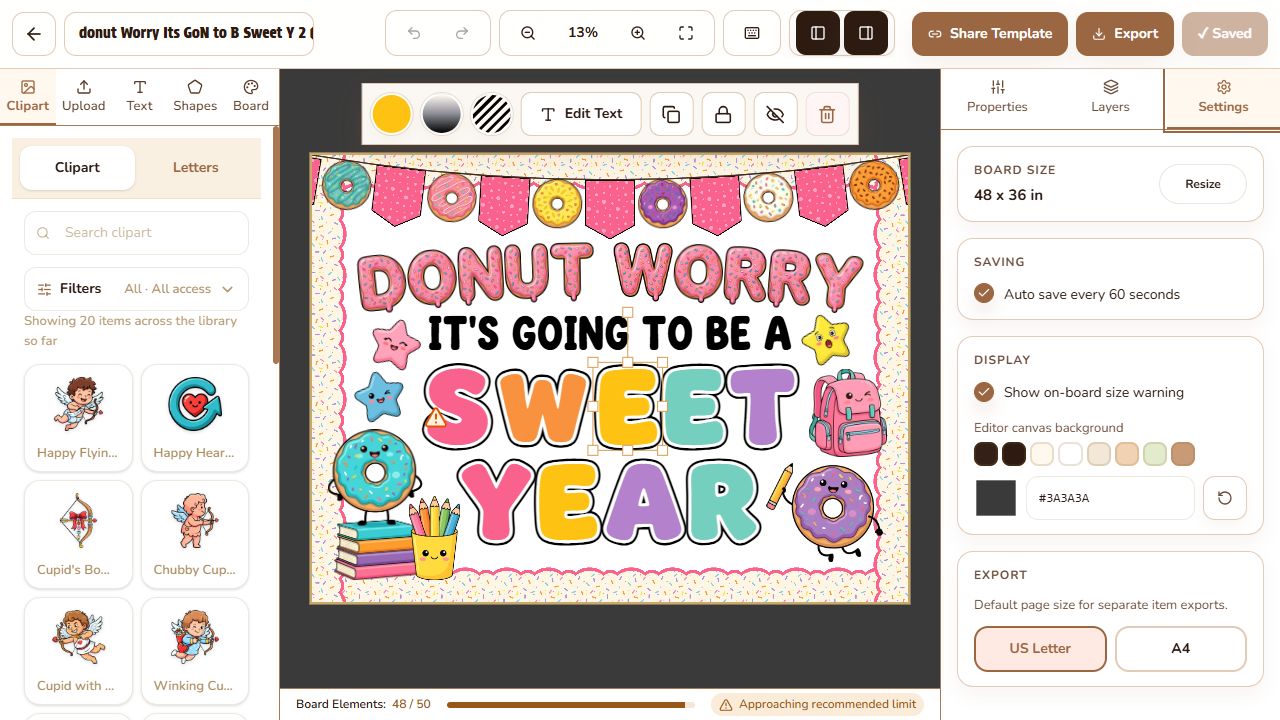
Board size: review the current physical dimensions or select Resize. Resizing scales the design with the board.
Autosave: save changes automatically about every 60 seconds while enabled.
On-board size warning: show warnings when an item may need special handling during printing.
Editor canvas background: change the color around the board to improve contrast while designing. This workspace color is not part of the exported board.
Default page size: choose US Letter or A4 for separate-item print exports.
Area 7
Saving and exporting
The button at the top right communicates the board’s save state. After an edit, use Save and wait for Saved before leaving or exporting. When Autosave is enabled, BoardCraft also saves periodically, but manual Save gives you an immediate confirmation.
Select Export when the design is ready.
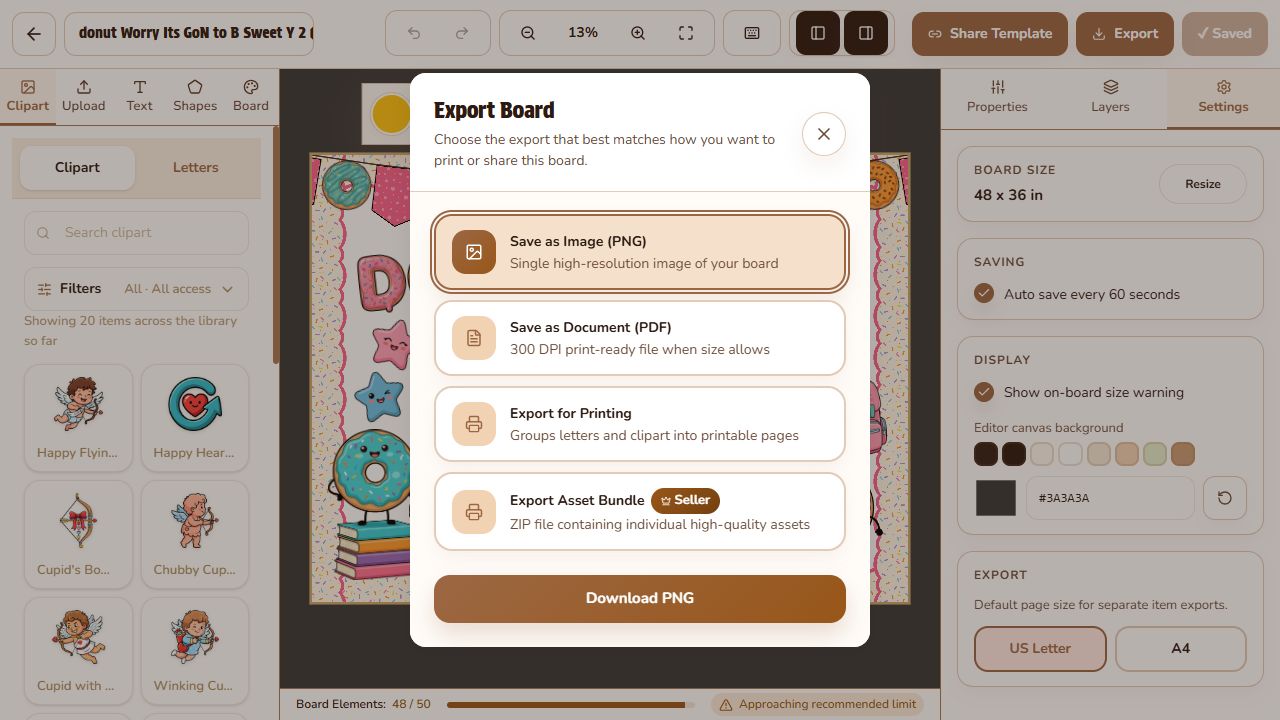
Save as Image (PNG): one high-resolution image of the complete board.
Save as Document (PDF): a print-ready PDF when the board size allows.
Export for Printing: groups letters and clipart into printable pages for assembly.
Export Asset Bundle: a Seller-plan ZIP containing individual high-quality assets.
Opening this dialog does not immediately export. Choose an option, review its settings, and then use the download button.
Area 8
Keyboard shortcuts
Select the keyboard icon in the top toolbar to open BoardCraft’s complete shortcut reference.
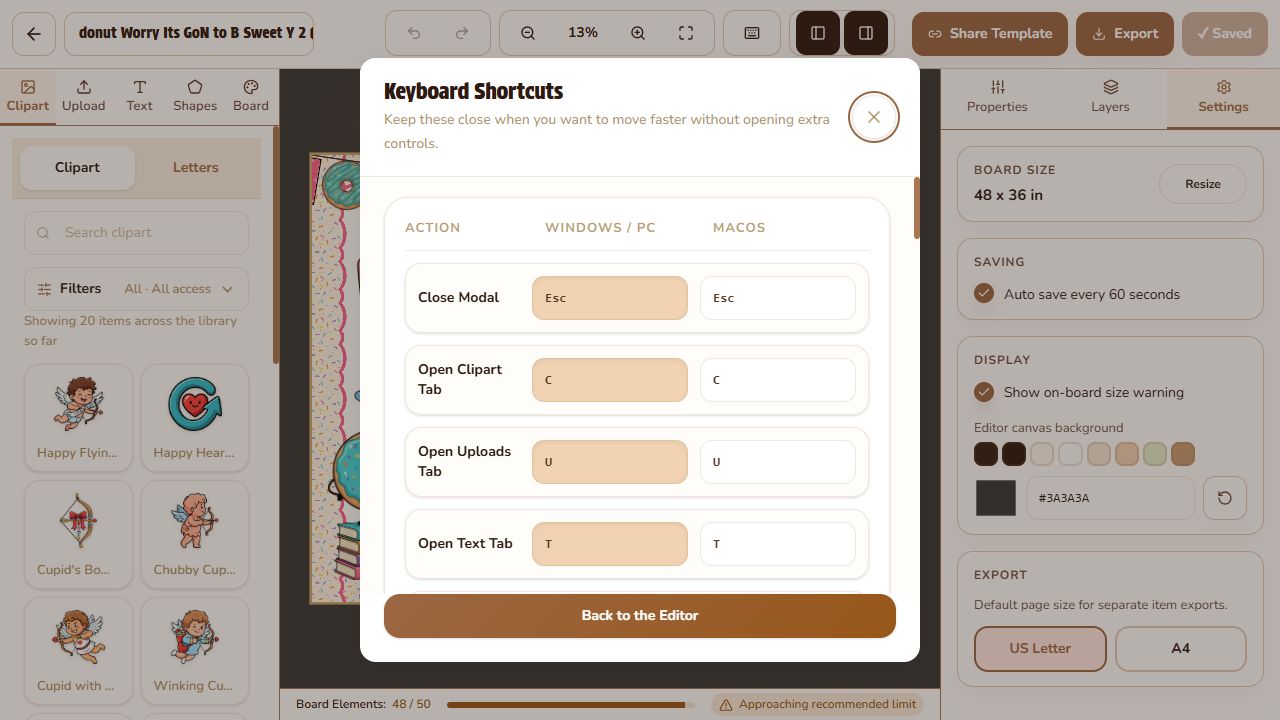
These are the most useful shortcuts to learn first:
Action | Windows / PC | macOS |
|---|---|---|
Save | Ctrl + S | Cmd + S |
Undo | Ctrl + Z | Cmd + Z |
Duplicate | Ctrl + D |
Shortcuts work while the board workspace is focused. If a shortcut does not respond, click the canvas and try again. Avoid using single-letter shortcuts while typing into a text field.